Products
Solutions
Resources
9977 N 90th Street, Suite 250 Scottsdale, AZ 85258 | 1-800-637-7496
© 2024 InEight, Inc. All Rights Reserved | Privacy Statement | Terms of Service | Cookie Policy | Do not sell/share my information

During a project, you might need to move costs from one area of the budget to another to account for project changes, without changing the total budget amount. In Control, you can manage budget moves via a controlled approval process.
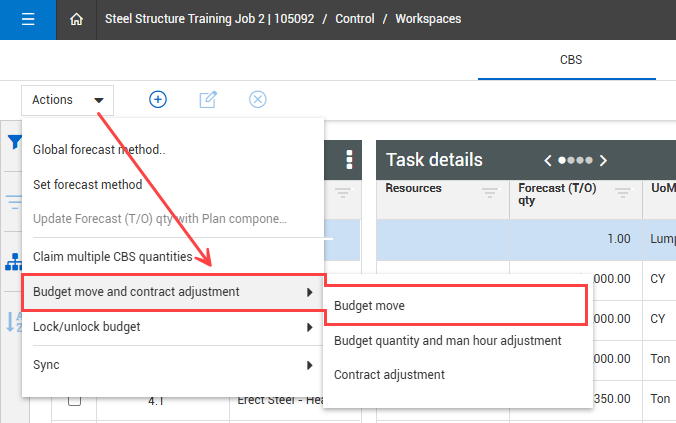
To launch a budget move in Control, from the CBS tab of the Workspaces module, select Actions > Budget move & contract adjustment > Budget move. This opens a Budget move record with the option to fill out the record following one of two workflows.
The following table provides information about each budget move workflow.
| Budget move workflow | Description | Pros | Cons |
|---|---|---|---|
| Associated | Links each source cost item to a target cost item as a single transfer transaction. |
|
|
| Non-associated | Treats each adjustment (debit or credit) as a standalone action, without explicitly linking the source and destination. |
Flexibility — Can make quick, one-sided adjustments without needing to define where the funds are coming from or going to. Faster entry — Useful when you're adjusting budgets over time and the counterbalance to the move is handled later or separately. Auto-calculate — Only non-associated budget moves contain the feature to automatically generate CB budget adjustments from CE values and CE values from CB budget adjustments. |
Lack of traceability — Harder to tell where money came from or where it went, which complicates reviews and audits. Potential for confusion — Can lead to misunderstanding or misreporting of why certain budget changes occurred. Reduced accountability — Without links, it’s easier to lose the rationale for the budget changes, especially over a long project timeline. |
The following are considerations when performing a budget move using the Associated workflow option:
Current Budget cost and man-hours are only maintained at the terminal level. You cannot move cost to or from a parent cost item.
You can move costs between multiple cost items at the same time.
You can automatically update Current Estimate (CE) values from Current Budget (CB) values only in a non-associated budget move or a contract adjustment.
Select Actions > Budget move & contract adjustment > Budget move.
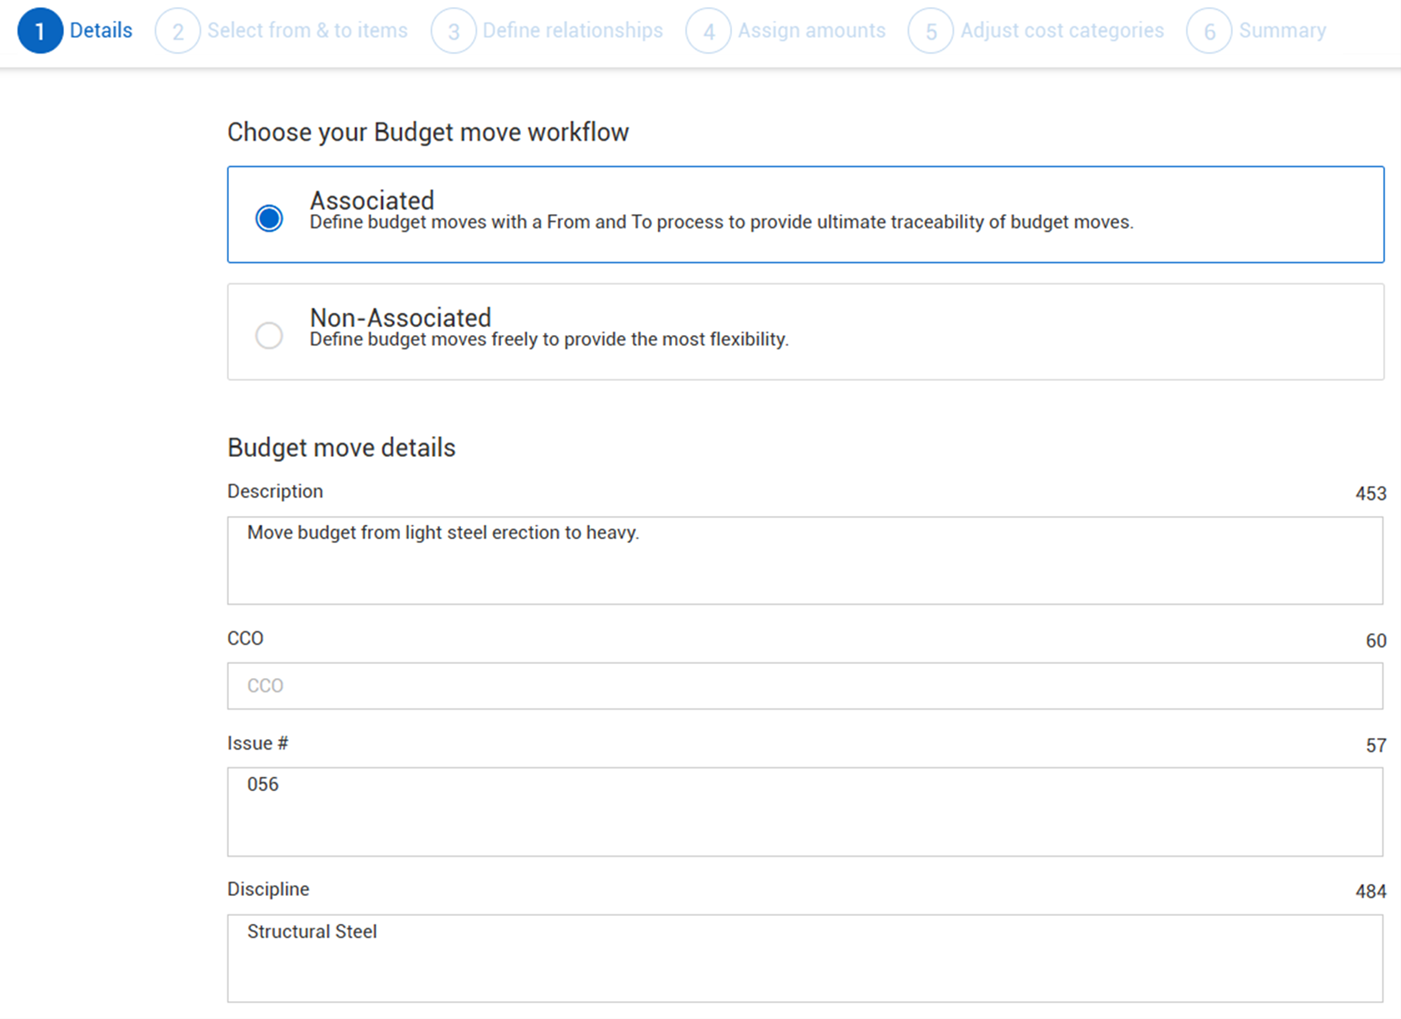
The Budget Move wizard opens to the step 1, Details.
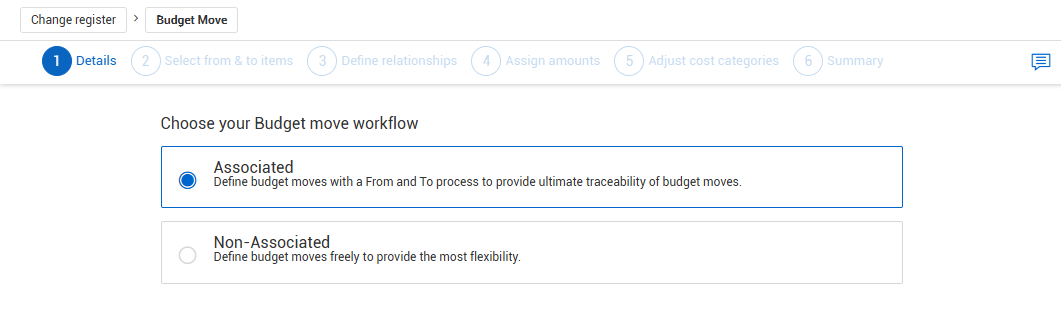
Select the Associatedoption and add budget move details as needed, and then click Next.
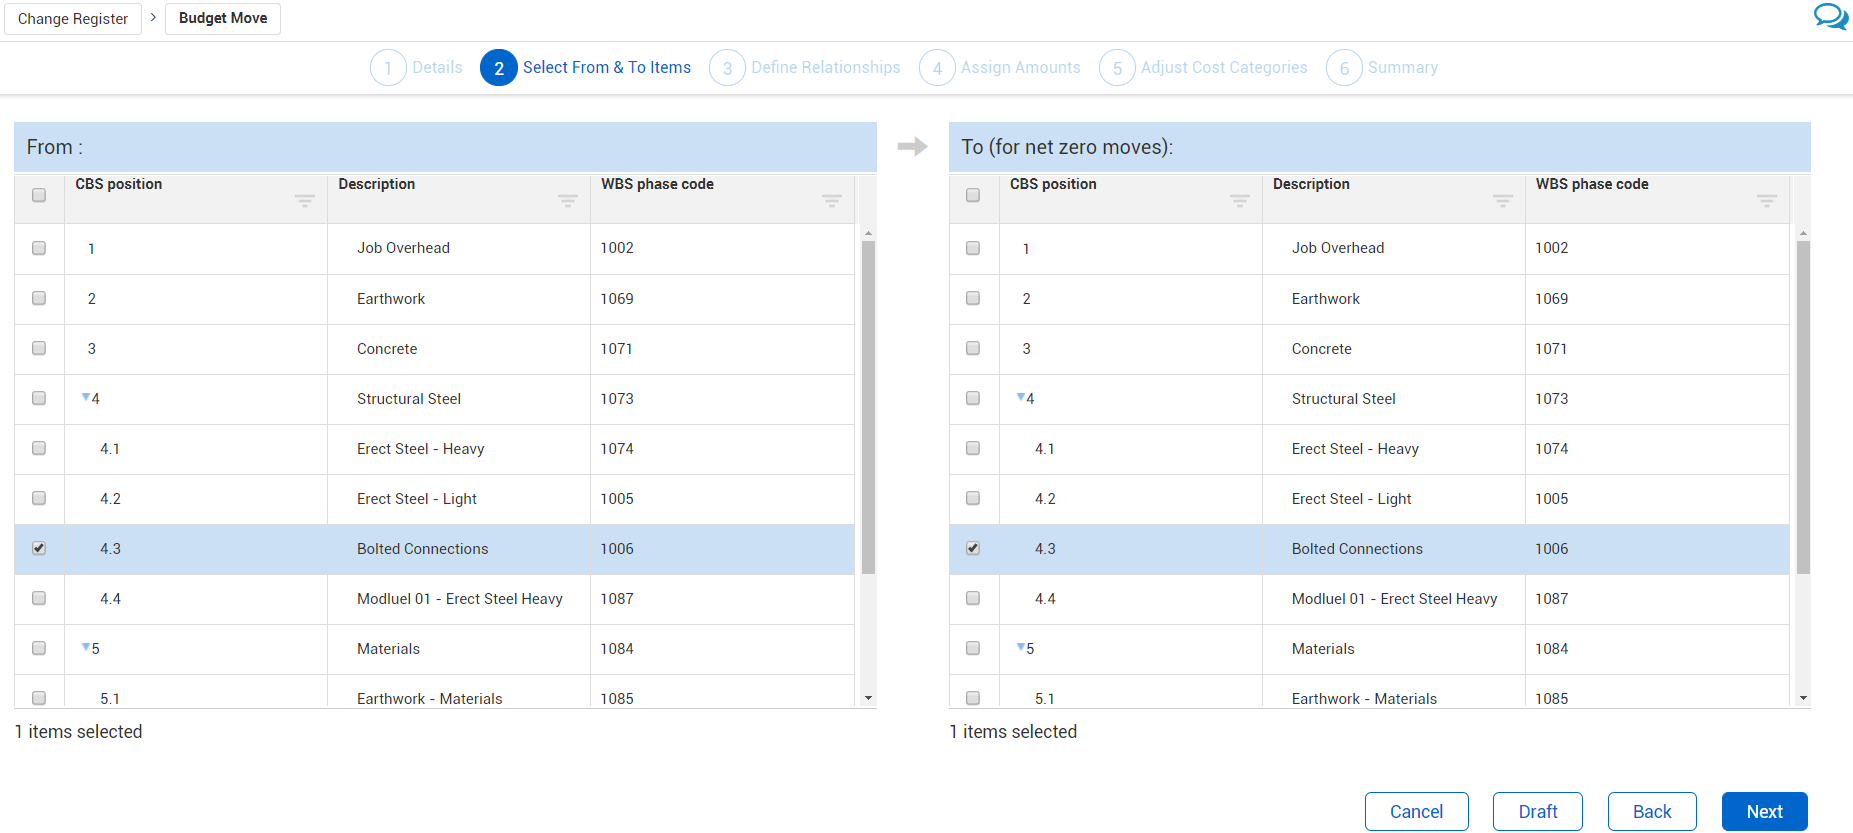
The Budget move wizard opens step 2, Select from & to items.
From the From section on the left, select the cost items you need to move budget from and from the To (for net zero moves) section on the right, select the cost items you need to move budget to.
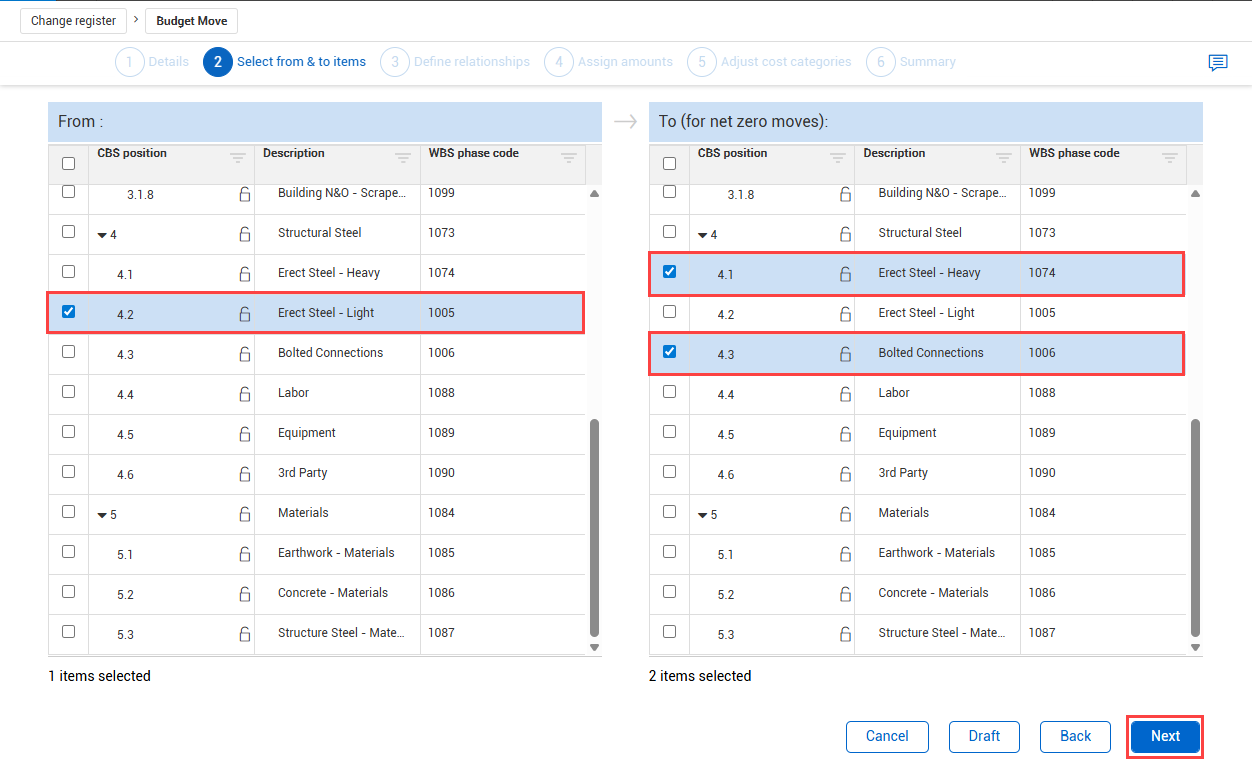
Click Next. The Budget move wizard opens to step 3, Define relationships.
For each cost item listed under the From section, select Define to do one of the following:
Select Cost category, Qty or MHr adjustment only to modify only the cost category, quantity or man-hours of the cost item (not the cost item’s cost).
Select the cost item or items to move budget to that includes costs. You can click Select All to select all the listed cost items.
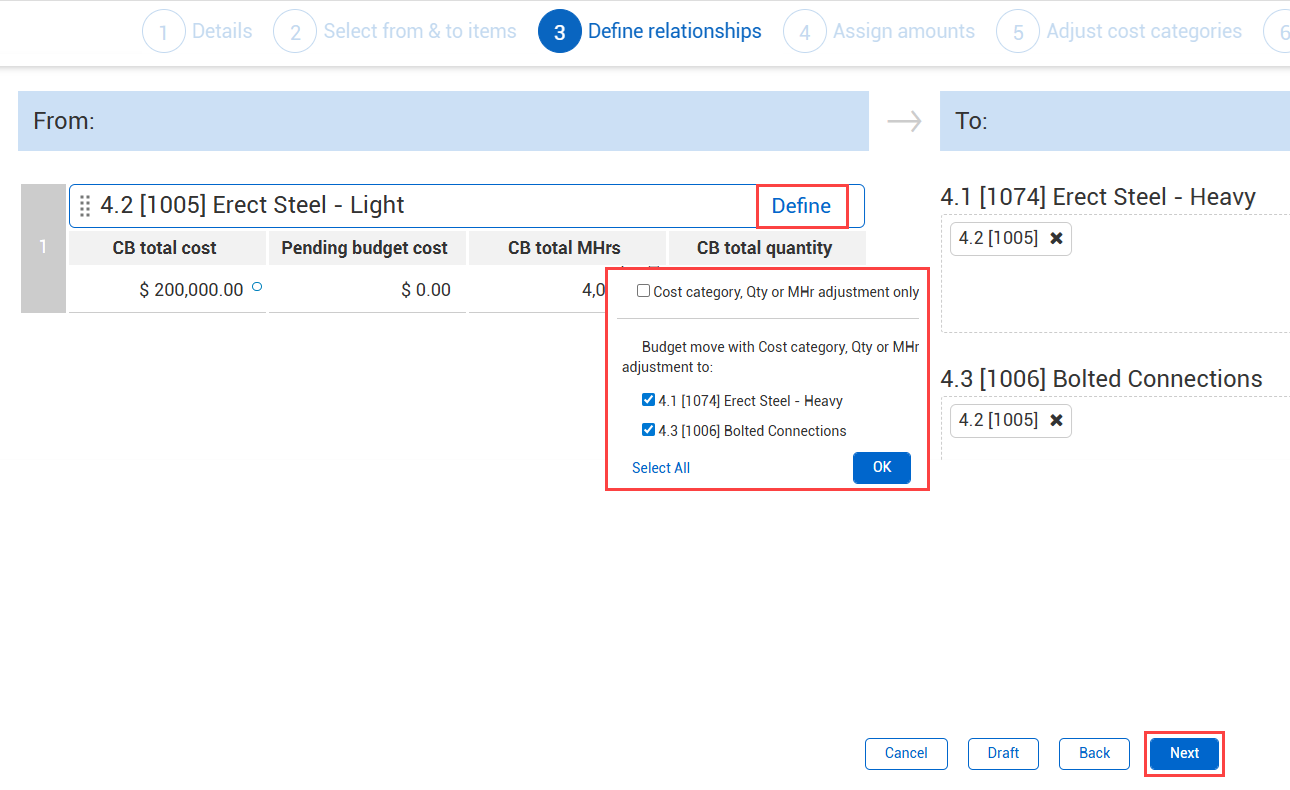
Click OK to close the Define window. Now, for each cost item under the To section, it shows the cost items you associate to it from the From section.
Click Next. The Budget move wizard opens to step 4, Assign amounts.
In Assign amounts, you can move costs, quantities, and man-hours.
You can move costs and man-hours by entering values in the CB total cost and CB total MHrs fields under the To section. This automatically deducts the amounts from the assigned cost items under the From section.
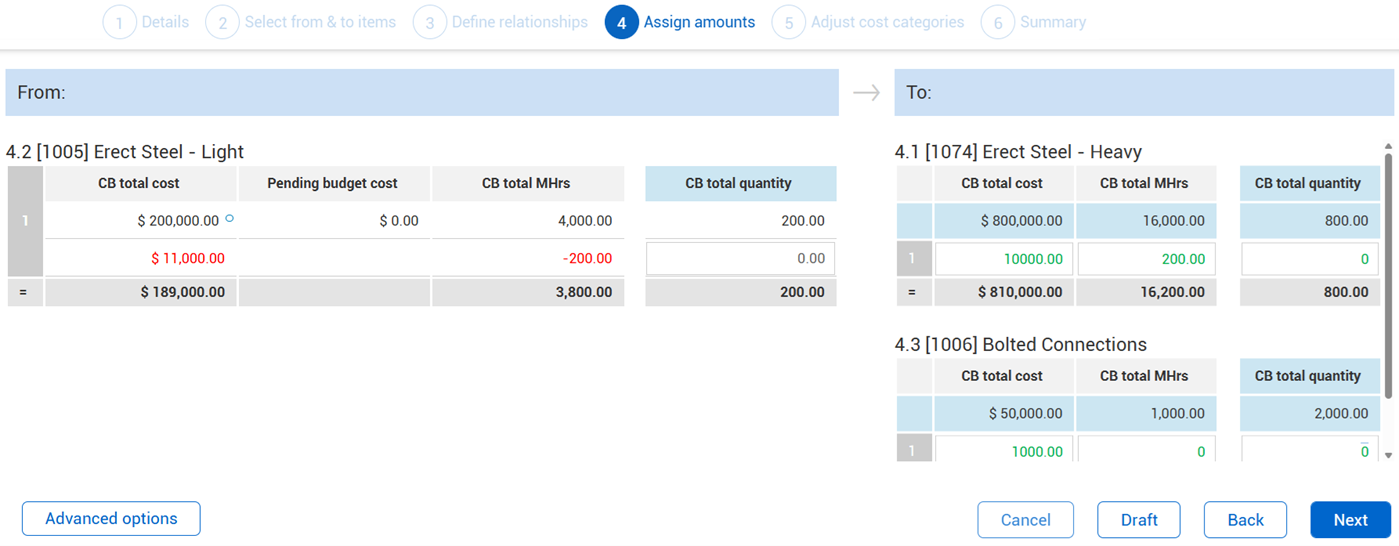
You can enter CB Total Quantity values on the To section. They do not automatically deduct from the From section because you could be moving between cost items with differing units of measure.
You may need to add more or fewer man-hours than you deduct. To allow this, select Advanced options and switch the Adjust MHrs (not net zero) to On. The CB total MHrs of your From cost items will no longer automatically deduct when you make adjustments to your To cost items.
Click Next. The Budget move wizard opens to step 5, Adjust cost categories.
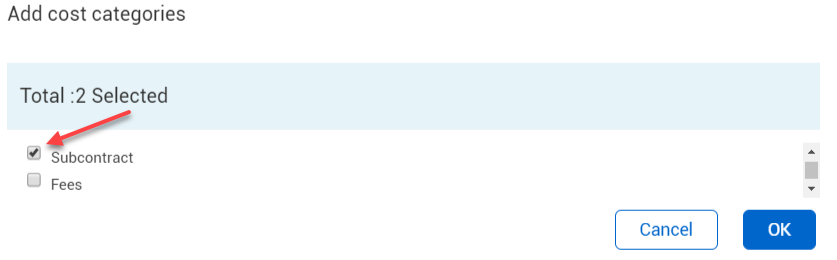
In Adjust cost categories, you can assign your pending budget changes to existing and new cost categories of your cost item. For each cost item under the To section, click the Add cost category button to reassign costs to different cost categories.
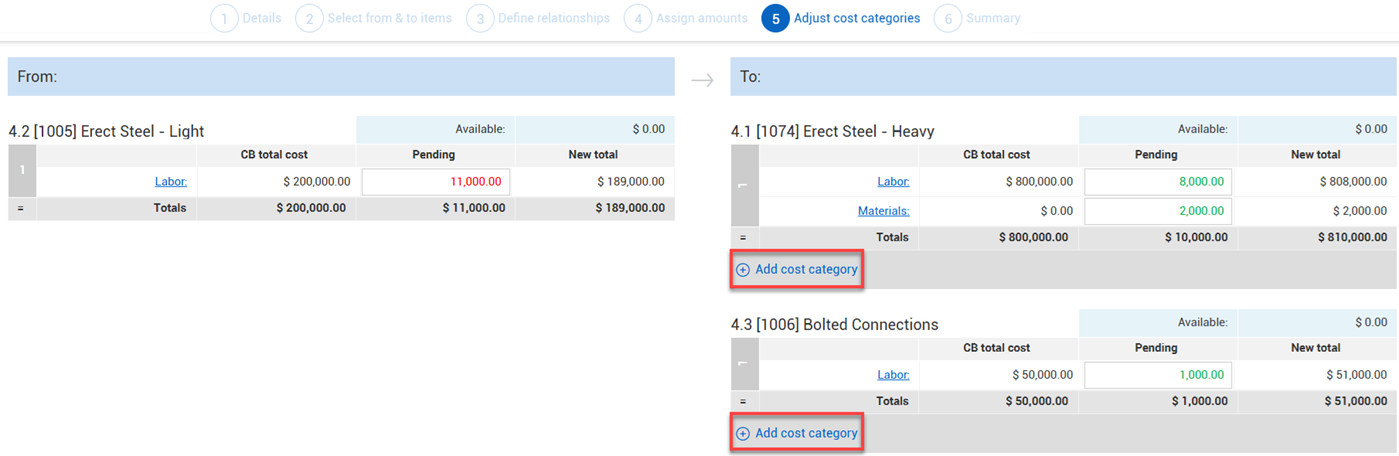
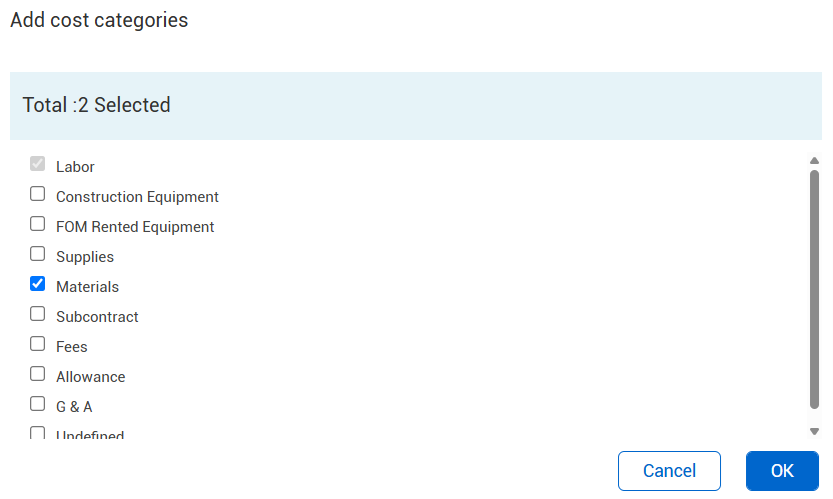
On the Add cost categories window, select a cost category, then click OK.
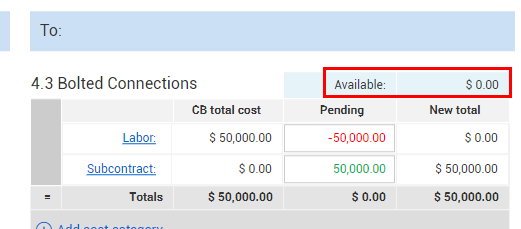
In the Pending fields, adjust the cost category amounts as needed.
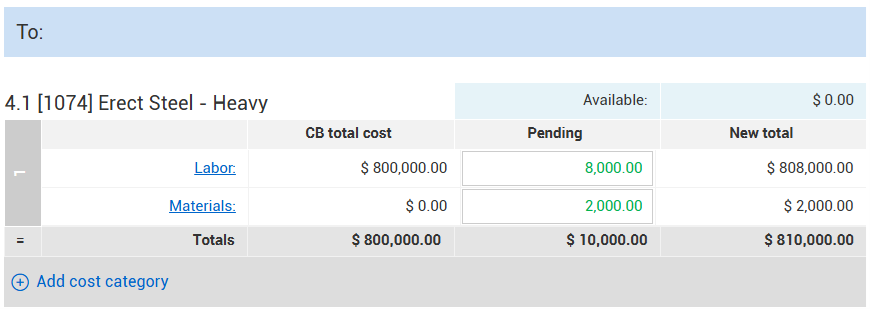
After making your adjustments, the Available amount should equal $0.00.
Click Next. The Budget move wizard opens to step 4, Summary.
In Summary, review your proposed changes, and then click Submit to send the budget move for approval.
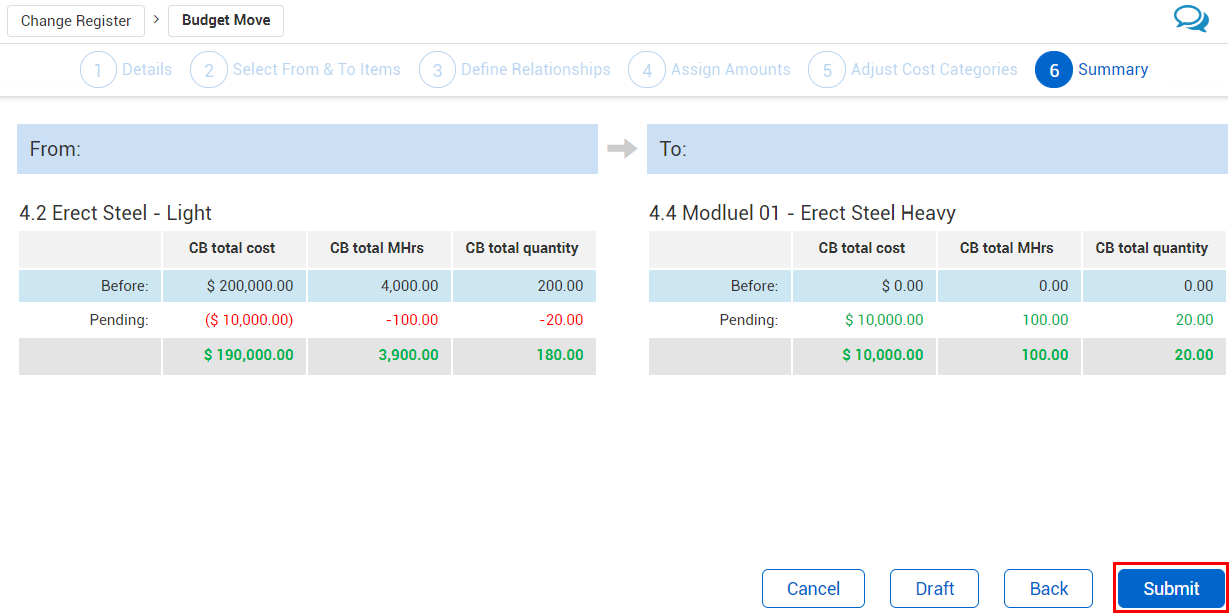
Select Draft if the budget move is not ready to be submitted and needs to be saved for later.
At times, you might encounter changes that require you to make budget changes within the cost categories of a single cost item. For example, you may find that some items that you estimated to be self-performed work may be faster and cheaper if they were subcontracted out. Therefore, you can perform a budget move for a single cost item to redistribute the budgeted cost between different cost categories.
Select Actions > Budget move & contract adjustment > Budget move.
The Budget Move wizard opens to the step 1, Details.
In Details, select the Associatedoption and add budget move details as needed, and then click Next.
The Budget move wizard opens step 2, Select from & to items.
In Select from & to items, select the same cost item under both the From and To sections, and then click Next.
The Budget Move wizard opens to the step 3, Define relationships.
In Define relationships, click the Define button, and then select Cost category, Qty, or MHr adjustment only.

Selecting the Cost category, Qty, or MHr adjustment only option lets you move budgeted cost category values within a single cost item.
Click OK to close the Define window, and then Next. The Budget move wizard opens to step 4, Assign amounts.
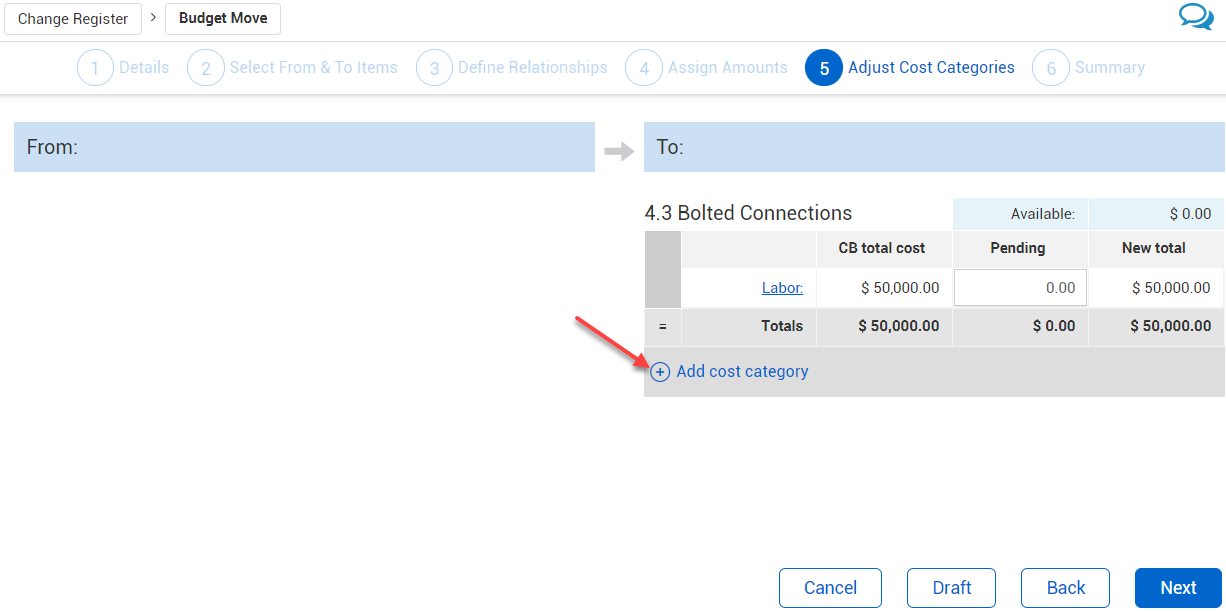
In Assign amounts, click Next to skip the Assign amounts step because we are not changing the man-hours or quantities. The Budget move wizard opens to step 5, Adjust cost categories.
Click the Add cost category button to assign your pending budget changes to existing and new cost categories of your cost item.
On the Add cost categories window, select the cost categories to include in the adjustment, and then click OK.
Make adjustments in the cost category Pending fields as needed.
The values shown in the Available and New total fields will automatically adjust based on the values entered in the To Pending fields
The amount in the Available field must be $0.00 to proceed to the next step.
Click Next. The Budget move wizard opens to step 4, Summary.
In Summary, review your proposed changes, then click Submit to send the budget move for approval.
The budget move will now be listed in the project’s Change Register with a status of Pending.
Additional Information
9977 N 90th Street, Suite 250 Scottsdale, AZ 85258 | 1-800-637-7496
© 2024 InEight, Inc. All Rights Reserved | Privacy Statement | Terms of Service | Cookie Policy | Do not sell/share my information